This step-by-step guide from Whapi.Cloud -- a WhatsApp API gateway provider -- covers how to build a production-ready WhatsApp AI chatbot with GPT-4o and Node.js. WhatsApp has no native ChatGPT integration: no toggle, no official plugin, no direct OpenAI endpoint you can point at a phone number. Connecting GPT-4o to WhatsApp requires three components: an API gateway that receives WhatsApp messages and delivers them to your server, a webhook server that processes those messages, and a session layer that preserves conversation history across turns. You can build, test, and deploy this entire stack in under two hours.
This guide is written for developers and technical founders building AI assistants for WhatsApp. It is not a five-minute demo tutorial -- it is a production-oriented walkthrough covering the full message pipeline: webhook setup, session state management, error recovery, cost estimation, and HTTPS deployment on a real server. Every section addresses a failure mode that simpler guides skip. It does not cover WhatsApp Flows, VoIP, or official Meta BSP onboarding -- those are separate topics.
What Most Tutorials Get Wrong About WhatsApp AI Chatbots
A working demo is not a production bot. Most "build a WhatsApp ChatGPT bot" articles stop at the webhook concept -- they show you how to receive a message, call the OpenAI API, and send a reply. That works once, in isolation, with a single test message. It breaks immediately once you have real users.
Rate limits, session handling, and HTTPS are required from day one. Here is what typically breaks:
-
Stateless GPT-4o calls: Without session management, every message is a fresh conversation. The bot has no memory of who the user is or what was said ten seconds ago. It cannot follow up, cannot reference context, and cannot build the conversational flow that makes an AI assistant useful.
-
No error handling: If the OpenAI call fails or times out, the bot sends nothing. The user sees silence and assumes it is broken -- because as far as they can tell, it is. Silent failures are indistinguishable from offline bots.
-
ngrok in production: Ngrok is a development tool. Tunnels drop without warning, URLs change on restart, and there is no process management. When the tunnel dies, your bot goes offline -- silently, with no alerts.
-
Hardcoded API keys: Credentials in source code eventually end up in git history or server logs. This is a security failure, not a "fixable later" concern.
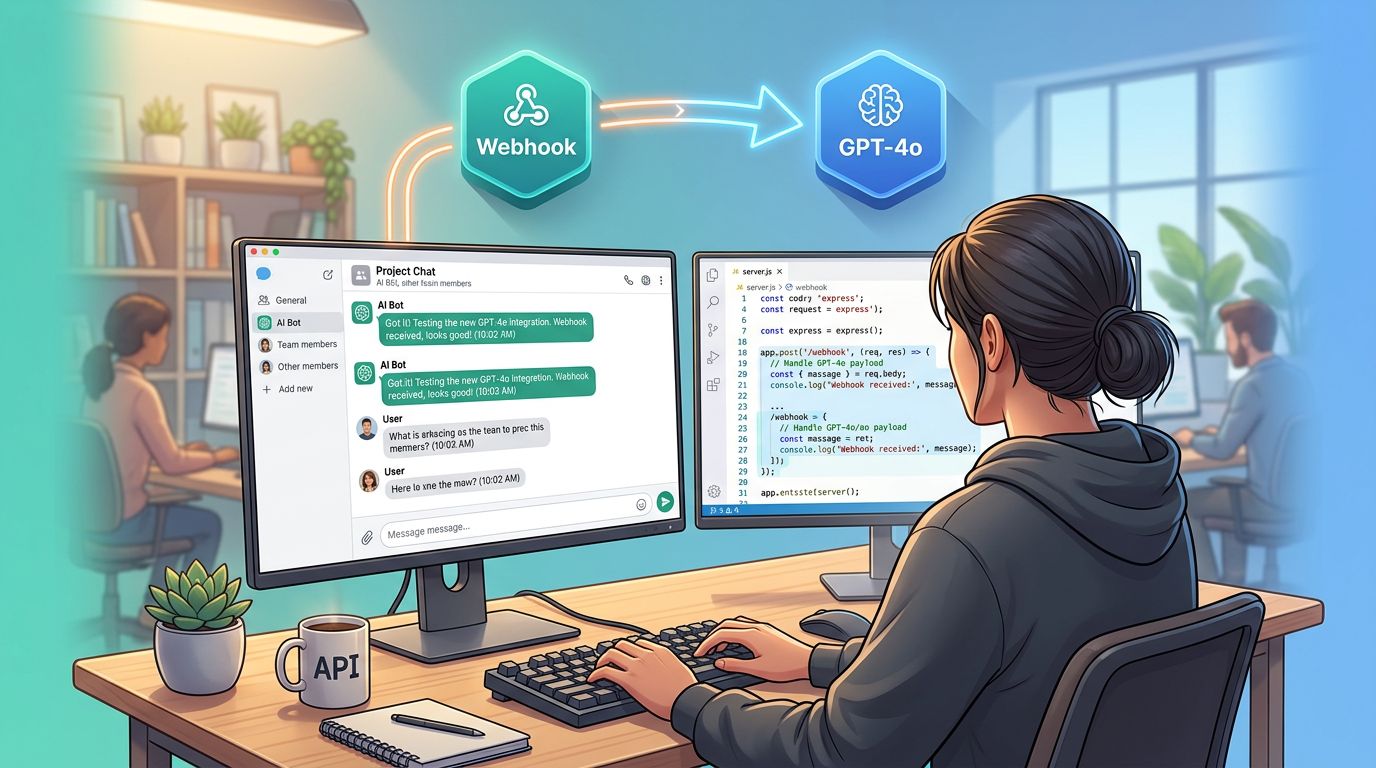
The Full Message Pipeline: WhatsApp → Whapi.Cloud → GPT-4o → WhatsApp
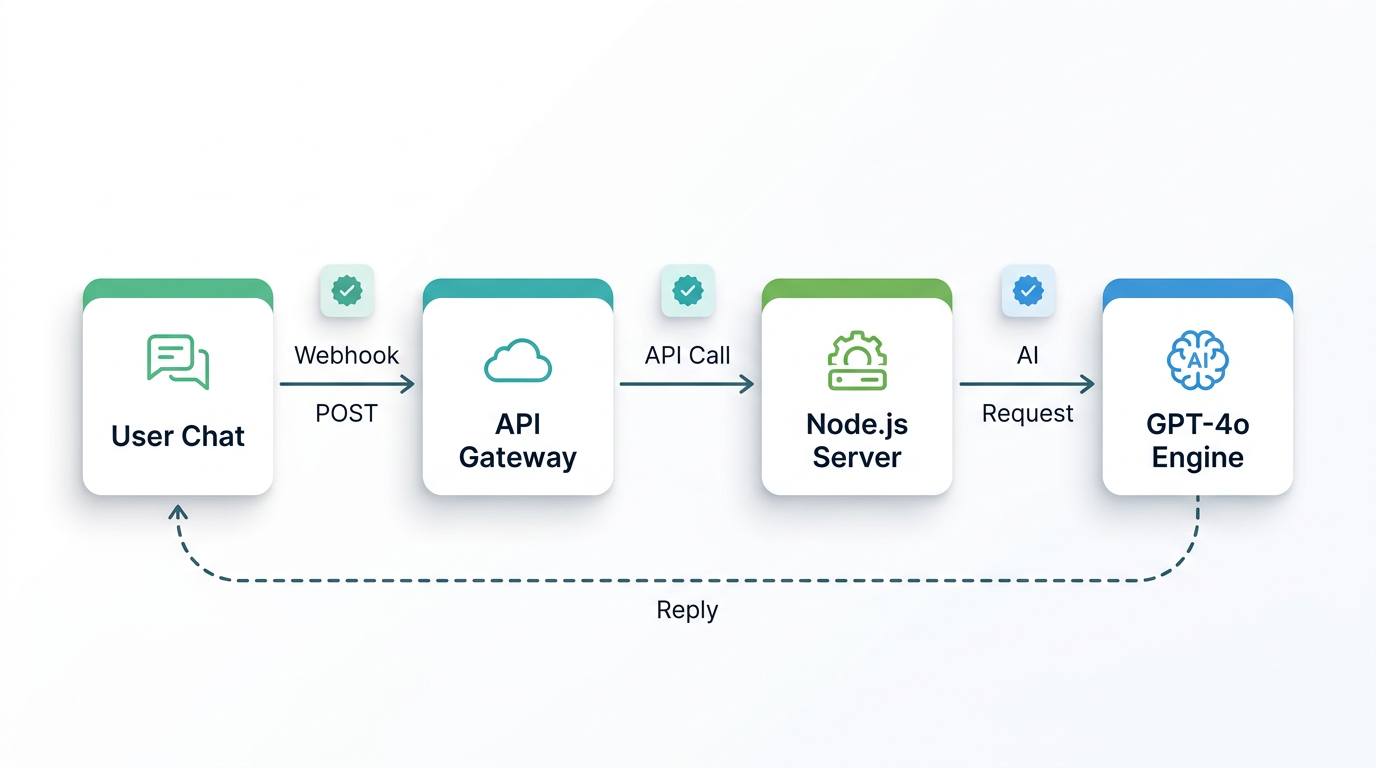
Understand the pipeline before writing a single line of code -- it determines your architecture. Every message your user sends travels through four hops:
- WhatsApp → Whapi.Cloud: The user sends a WhatsApp message. Whapi.Cloud receives it via its web-session socket connection -- the same mechanism WhatsApp Web uses -- and delivers it to your server as an HTTP POST request.
- Whapi.Cloud → Your Webhook Server: Your Node.js/Express server receives the webhook payload. It extracts the sender ID and message text, then routes the request to your AI handler.
- Your Server → OpenAI GPT-4o: Your server calls the OpenAI Chat Completions API with the user's message plus the full conversation history. GPT-4o returns a reply.
- Your Server → Whapi.Cloud → WhatsApp: Your server sends the reply to Whapi.Cloud's send-message endpoint. Whapi.Cloud delivers it to the user's WhatsApp.
Each hop adds latency. GPT-4o itself takes 1--3 seconds at standard load. WhatsApp delivery is near-instant. Total user-perceived response time is typically 2--5 seconds -- set that expectation in your product design, not as an apology after launch. For the complete incoming payload format, see the incoming webhook format reference.
Prerequisites: What You Need Before Writing a Line of Code
You need four things configured before starting:
-
Whapi.Cloud account: Register at panel.whapi.cloud/register. The free plan is sufficient for development and testing.
-
OpenAI API key: Generate one at platform.openai.com. GPT-4o access is available on the standard API tier with usage-based billing.
-
Node.js v18+: Any modern LTS release works. You will install four packages:
express,openai,axios, anddotenv. -
ngrok (dev only): Exposes your local server to the internet so Whapi.Cloud can deliver webhooks during development. Replace it with a real HTTPS server URL before going to production.
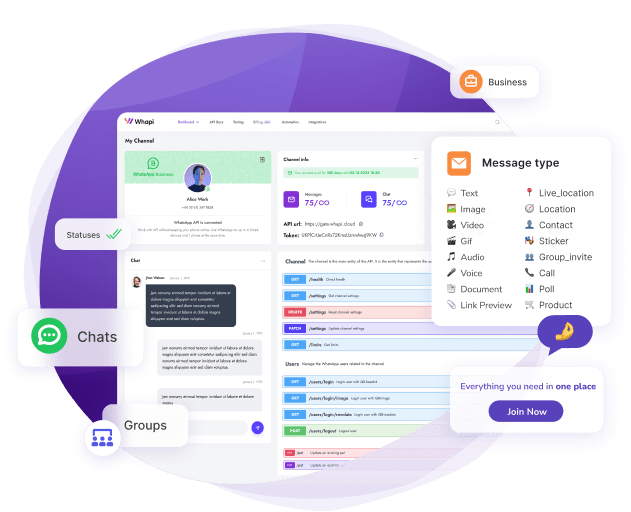
Step 1 -- Get WhatsApp API Access with Whapi.Cloud (No Meta BSP Required)
Whapi.Cloud gives you webhook access to WhatsApp without Meta BSP registration. You connect a WhatsApp number by scanning a QR code in the dashboard -- the same mechanism WhatsApp Web uses -- and you are ready to send and receive messages in under a minute. The official Meta path requires BSP registration, template pre-approval, and multi-step onboarding -- a process measured in days to weeks. Whapi.Cloud skips all of that: the user messages your bot, your bot responds.
To connect your WhatsApp number and register your webhook:
- Log in to your Whapi.Cloud dashboard.
- Create a new channel. Give it a name (e.g., "AI Support Bot").
- Scan the QR code with the WhatsApp account you want to use as your bot's number. The connection establishes immediately.
- Copy your channel API token -- you will need it in your
.envfile. - Go to the Webhooks section in your channel settings. Paste your server's public HTTPS URL (or ngrok URL during development), for example:
https://yourdomain.com/webhook. Save.
Once the webhook URL is saved, Whapi.Cloud forwards all incoming WhatsApp messages to your server as HTTP POST requests. For full setup details, see Whapi.Cloud's getting started guide.
Step 2 -- Build the Express Webhook Server
Start with your environment variables. Never hardcode API keys. Use a .env file and load it with dotenv -- this keeps credentials out of source code and out of version control:
# .env
OPENAI_API_KEY=sk-your-openai-key-here
WHAPI_TOKEN=your-whapi-cloud-token-here
WHAPI_API_URL=https://gate.whapi.cloud
PORT=3000
Install the required packages:
npm init -y
npm install express openai axios dotenv
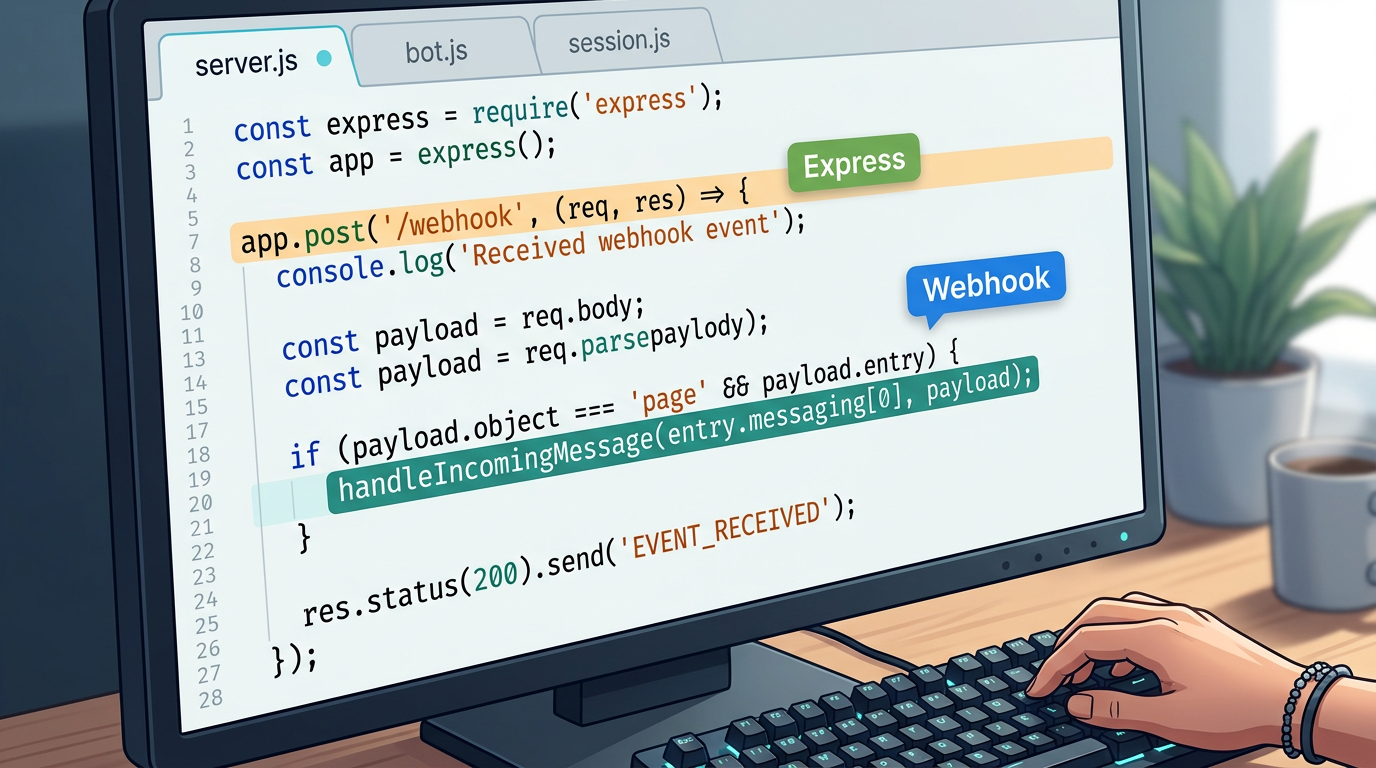
Now create server.js -- the entry point that starts Express and defines the webhook endpoint:
// server.js -- Entry point: starts Express and defines the webhook endpoint
require('dotenv').config();
const express = require('express');
const { handleIncomingMessage } = require('./bot');

const app = express();
app.use(express.json());

// Whapi.Cloud delivers all incoming WhatsApp messages to this endpoint as HTTP POST
app.post('/webhook', async (req, res) => {
  // Respond immediately -- Whapi.Cloud expects a fast 200 before processing
  res.sendStatus(200);

  const messages = req.body.messages;
  if (!messages || messages.length === 0) return;

  for (const message of messages) {
    // Skip outbound messages echoed back by Whapi.Cloud -- prevents infinite reply loops
    if (message.from_me) continue;
    // This guide covers text messages only; other types (image, audio) require separate handling
    if (message.type !== 'text') continue;

    const senderId = message.from;       // WhatsApp Chat ID of the sender
    const userText = message.text.body;  // The user's message text

    await handleIncomingMessage(senderId, userText);
  }
});

const PORT = process.env.PORT || 3000;
app.listen(PORT, () => console.log(`Webhook server running on port ${PORT}`));
Two implementation decisions that matter here. First: respond with 200 OK immediately, before processing the message. If you process synchronously first, slow GPT-4o responses can cause Whapi.Cloud to retry delivery -- and you end up handling the same message twice. Second: the from_me filter is not optional. Whapi.Cloud mirrors outbound messages back to your webhook. Without this check, your bot replies to its own messages in an infinite loop. This guide handles text messages; Whapi.Cloud also supports image, audio, document, and reaction types -- each delivered to the same webhook endpoint with a different type field. For a broader Node.js implementation reference, see Whapi.Cloud's Node.js WhatsApp bot guide.
Step 3 -- Connect GPT-4o to Your Webhook Handler
The bot module handles three jobs: loading the conversation history for this user, calling GPT-4o with that history, and sending the reply back via the Whapi.Cloud API. The sendMessageText operation requires two parameters: to (the recipient's WhatsApp Chat ID) and body (the message text) -- both verified against the Whapi.Cloud API schema.
// bot.js -- GPT-4o integration and Whapi.Cloud message send-back
const OpenAI = require('openai');
const axios = require('axios');
const { getHistory, saveHistory } = require('./session');

const openai = new OpenAI({ apiKey: process.env.OPENAI_API_KEY });

// System prompt defines the bot's persona, scope, and response style
// This is the most important configuration decision -- write it for your specific use case
const SYSTEM_PROMPT = {
  role: 'system',
  content: `You are a helpful AI assistant.
Keep replies concise -- WhatsApp users prefer short, clear messages.
If you cannot answer something, say so directly.`
};

// Calls GPT-4o with the full conversation history; returns the model's reply text
async function askGPT(history) {
  const response = await openai.chat.completions.create({
    model: 'gpt-4o',
    messages: [SYSTEM_PROMPT, ...history],
    max_tokens: 500,
    temperature: 0.7
  });
  return response.choices[0].message.content.trim();
}

// Sends a text reply to the user via Whapi.Cloud REST API
// Required params (verified via MCP): to (string), body (string)
async function sendWhatsAppMessage(to, body) {
  await axios.post(
    `${process.env.WHAPI_API_URL}/messages/text`,
    { to, body },
    { headers: { Authorization: `Bearer ${process.env.WHAPI_TOKEN}` } }
  );
}

// Main handler: load history → call GPT-4o → save updated history → send reply
async function handleIncomingMessage(senderId, userText) {
  try {
    const history = await getHistory(senderId);

    // Append the new user message to history
    history.push({ role: 'user', content: userText });

    // Truncate to last 20 messages -- controls token cost regardless of conversation length
    const truncatedHistory = history.slice(-20);

    // Call GPT-4o with the full conversation context
    const reply = await askGPT(truncatedHistory);

    // Append the assistant reply and persist the updated history
    truncatedHistory.push({ role: 'assistant', content: reply });
    await saveHistory(senderId, truncatedHistory);

    // Deliver the reply to the user's WhatsApp
    await sendWhatsAppMessage(senderId, reply);

  } catch (error) {
    console.error(`[${new Date().toISOString()}] Error for ${senderId}:`, error.message);

    // Always send a fallback -- never leave the user with silence
    await sendWhatsAppMessage(
      senderId,
      'I encountered an issue processing your request. Please try again in a moment.'
    ).catch(e => console.error('Failed to send fallback message:', e.message));
  }
}

module.exports = { handleIncomingMessage };
The system prompt is the most consequential configuration in your chatbot. A vague prompt produces off-topic or excessively long replies -- particularly harmful on WhatsApp, where users expect concise answers. Write it for your exact use case: define the assistant's scope, communication style, and what it should say when it cannot answer. Do not treat this as a placeholder.
Without Session State, GPT-4o Treats Every WhatsApp Message as a New Conversation
GPT-4o is stateless. Each API call is independent -- the model has no memory of previous calls unless you explicitly include prior messages in the messages array. Without a session layer, every WhatsApp message your user sends is treated as the opening of a brand-new conversation. The bot cannot follow up, cannot reference what was said, and produces a genuinely disorienting experience for users who expect continuity.
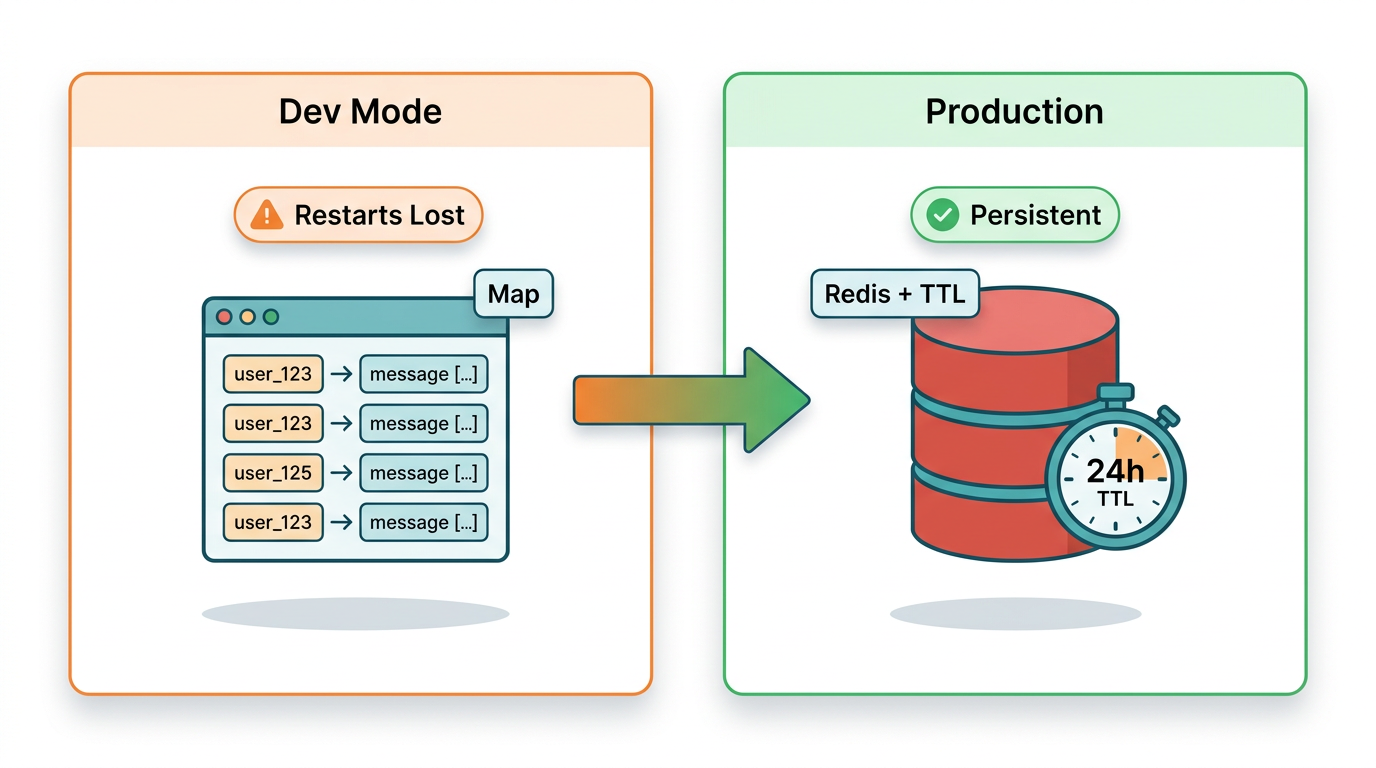
Tier 1 -- In-Memory Map (Development Only)
For local development and quick testing, a JavaScript Map keyed by sender ID works with zero configuration:
// session-memory.js -- In-memory session store
// Inputs: senderId (string). Returns: history array (messages[]).
// WARNING: data is lost on every server restart. Use only in development.
const sessions = new Map();

function getHistory(senderId) {
  if (!sessions.has(senderId)) {
    sessions.set(senderId, []);
  }
  return Promise.resolve(sessions.get(senderId));
}

function saveHistory(senderId, history) {
  sessions.set(senderId, history);
  return Promise.resolve();
}

module.exports = { getHistory, saveHistory };
The critical limitation: this data lives in process memory. A server restart wipes every conversation. With concurrent users, you also risk unbounded memory growth with no eviction policy. This is acceptable for testing. It is not acceptable for production.
Tier 2 -- Redis with TTL (Production)
Redis with TTL is the correct session store for production WhatsApp bots with concurrent users. It survives server restarts, handles multiple app instances without conflict, and automatically expires stale sessions -- aligned with WhatsApp's own 24-hour conversation window:
// session-redis.js -- Redis-backed session store for production
// Inputs: senderId (string), history array. Outputs: history array.
// TTL of 24 hours mirrors the WhatsApp session window -- sessions expire together.
const redis = require('redis');

const client = redis.createClient({ url: process.env.REDIS_URL || 'redis://localhost:6379' });
client.connect().catch(console.error);

const SESSION_TTL_SECONDS = 86400; // 24 hours

async function getHistory(senderId) {
  const data = await client.get(`session:${senderId}`);
  return data ? JSON.parse(data) : [];
}

async function saveHistory(senderId, history) {
  await client.setEx(
    `session:${senderId}`,
    SESSION_TTL_SECONDS,
    JSON.stringify(history)
  );
}

module.exports = { getHistory, saveHistory };
Add the redis package (v4+) to your dependencies and set a REDIS_URL environment variable. To switch from the in-memory store to Redis, change one line in bot.js: require('./session-memory') becomes require('./session-redis'). The interface is identical -- both modules export getHistory and saveHistory with the same signature.
| Approach | Persistence | Concurrent users | Setup effort | Recommended for |
|---|---|---|---|---|
| In-memory Map | Lost on restart | Single instance only | None | Local development |
| Redis with TTL | Survives restarts | Multi-instance safe | Moderate | Production |
Error Handling: Every Silent GPT-4o Failure Leaves Your User with No Response
Every production WhatsApp bot needs error handling. This is not optional and not a "v2 improvement." If your GPT-4o call fails -- due to an OpenAI timeout, a rate limit hit, or a network error -- and you have no error handler, the user receives nothing. They will assume the bot is broken. In most cases, they will be right.
The bot.js example above includes the basic try/catch with a fallback message. Extend it with targeted error classification so your logs are actionable:
// Extended error classification inside handleIncomingMessage's catch block
} catch (error) {
  const timestamp = new Date().toISOString();

  if (error.status === 429) {
    // OpenAI rate limit -- you have exceeded tokens-per-minute for this API key
    // Consider queuing requests or implementing exponential backoff
    console.warn(`[${timestamp}] OpenAI rate limit hit for ${senderId}. Status: 429`);
  } else if (error.code === 'ECONNABORTED' || error.code === 'ETIMEDOUT') {
    // OpenAI request took too long -- network issue or model overload
    console.warn(`[${timestamp}] OpenAI request timed out for ${senderId}`);
  } else {
    // Unknown error -- log fully for investigation
    console.error(`[${timestamp}] Unhandled error for ${senderId}:`, error.message);
  }

  // Send user-visible fallback regardless of error type
  try {
    await sendWhatsAppMessage(
      senderId,
      'I am having trouble right now. Please try again in a moment.'
    );
  } catch (sendError) {
    // If even the fallback fails, the Whapi.Cloud connection itself is likely broken
    console.error(`[${timestamp}] Fallback send failed for ${senderId}:`, sendError.message);
  }
}
Always log errors with timestamps and sender IDs. Entries without timestamps are nearly useless in production -- you cannot correlate them with user reports, OpenAI status incidents, or Whapi.Cloud delivery logs. If your fallback send also fails, that is a separate signal: your connection to Whapi.Cloud is broken, not just your OpenAI call. Treat these two failure types as distinct alerts.
On OpenAI rate limits: HTTP 429 means you have exceeded your tokens-per-minute allocation. The immediate fix is a retry with exponential backoff. The structural fix -- if this recurs -- is to queue incoming messages and process them with a concurrency cap, rather than firing a GPT-4o call for every webhook simultaneously.
How Much Does a WhatsApp AI Bot Cost to Run? GPT-4o Cost Per Message
GPT-4o costs roughly $0.002--$0.005 per average WhatsApp message exchange at standard token usage. This estimate assumes a typical user message of 20--50 tokens and a model reply of 100--200 tokens, with a conversation history of 10--15 prior turns included in each API call. At these rates, 10,000 message exchanges cost approximately $20--$50 per month in OpenAI API fees.
Token costs scale directly with history length. Truncating to 20 messages -- as in the code above -- keeps per-call costs predictable regardless of total conversation length. You pay for 20 turns of context per call, no matter how long the conversation has been running.
GPT-4o costs more per token than GPT-3.5-turbo, but the quality difference is significant for open-ended conversational tasks. For structured, template-like responses where GPT-3.5-turbo is sufficient, swapping the model is a one-line change: replace 'gpt-4o' with 'gpt-3.5-turbo' in the askGPT function. Profile your actual usage and user satisfaction before downgrading -- premature optimization here often shows up as quality regressions in support tickets, not benchmark numbers.
Whapi.Cloud uses subscription-based pricing with no per-message fees of its own. See current Whapi.Cloud plan pricing to calculate the total stack cost for your message volume.
From ngrok to Production: Deploying Your WhatsApp AI Bot on a Real Server

Running ngrok in production is not a deployment strategy -- move to a real server before you share the bot with any actual users. Any Linux VPS with 1 GB RAM handles a single-channel bot at moderate message volume. You need Node.js installed, Redis running, and a domain name with a valid HTTPS certificate. WhatsApp blocks webhook deliveries to non-HTTPS URLs. There is no workaround.
Process Management with PM2
PM2 is the standard process manager for Node.js in production. It restarts your server automatically on crash and on system reboot:
# Install PM2 globally
npm install -g pm2

# Start the bot server under PM2 supervision
pm2 start server.js --name "whatsapp-ai-bot"

# Persist the PM2 process list across server reboots
pm2 save

# Generate and configure the system startup script
pm2 startup
After running pm2 startup, copy and run the command it outputs -- this registers PM2 with your system's init process so your bot restarts automatically after a server reboot.
HTTPS with Nginx and Let's Encrypt
Use Nginx as a reverse proxy in front of your Node.js server. Your Express app stays on http://localhost:3000 internally. Nginx terminates SSL and forwards requests. Get your certificate from Let's Encrypt via Certbot:
# Install Nginx and Certbot (Ubuntu/Debian)
sudo apt update && sudo apt install nginx certbot python3-certbot-nginx -y

# Obtain and auto-configure an SSL certificate for your domain
sudo certbot --nginx -d yourdomain.com

# Certbot configures Nginx automatically and sets up certificate renewal
# Your webhook endpoint will be available at: https://yourdomain.com/webhook
After Certbot runs, update your webhook URL in the Whapi.Cloud dashboard to https://yourdomain.com/webhook. Use the webhook test feature in the dashboard to verify delivery. If your server logs show the test payload arriving, the production setup is working.
Production Readiness Checklist
-
HTTPS enabled with a valid certificate (Let's Encrypt via Certbot)
-
PM2 running with startup persistence configured
-
Redis running with password authentication, not exposed publicly
-
All secrets in
.envenvironment variables -- not in source code or git history -
Error handling with user-visible fallback messages and timestamped server-side logging
-
Message history truncation to control token costs across long conversations
-
from_mefilter active -- prevents the bot from replying to its own outbound messages -
Webhook URL updated to production HTTPS domain in Whapi.Cloud dashboard
-
Webhook test confirmed -- test payload received and logged by your server
Over 3,000 teams use Whapi.Cloud in production daily. Infrastructure protections including unique proxies and regional providers handle the connectivity layer. Your responsibility is the application layer: session state, error handling, and the system prompt that defines what your bot actually does. Get those right and you have a bot worth shipping. For guidance on operating your WhatsApp number safely at scale, see Whapi.Cloud's guide to avoiding account bans.
Whapi.Cloud connects your WhatsApp number to your server in under a minute -- no Meta BSP registration, no template pre-approval process, no waiting period. Scan a QR code, paste your webhook URL, and start receiving messages. The implementation you need is already in this guide.